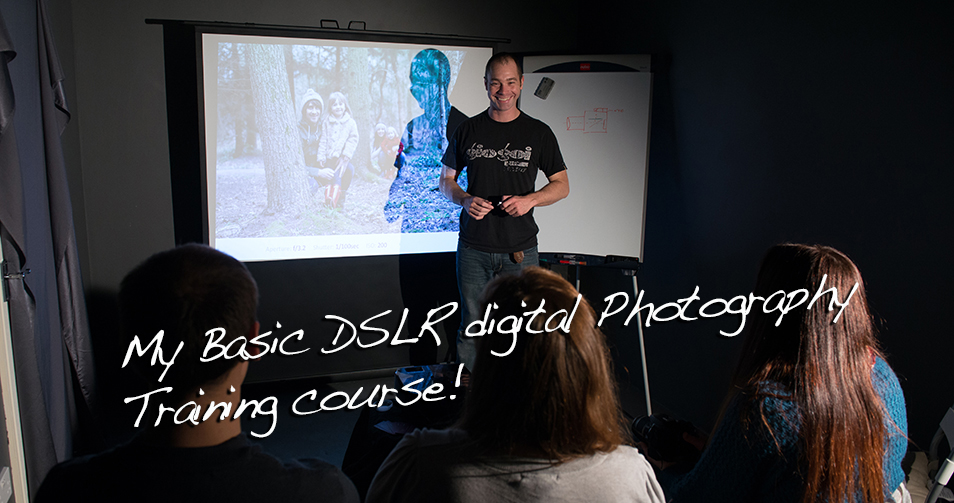
After a few years of really developing my taste for photography and learning a few bits and pieces I ended up getting deployed to Iraq in 2005, you can read all about that at the very start of this blog but what I wanted to tell you about now was how my deployments with the Army really spurred on my photography and assisted in the development of my skills.
The amount of time I think to myself I really should get out and practice my photography, or I read a magazine and think how I’d really like to try that technique out. But the thought of going out and taking photos of some flowers or finding something to take pictures of just doesn’t appeal to me at all! I’ve always thought if you’ve got something good to take photos of that’s half the battle because you’re interested and really want to get a great photo of what you’re looking at. You can really get creative, I’m lucky these days as I have constantly got jobs on that involve me taking photos, I always enjoy something new to photograph and I’m always trying new things out wanting to improve my pictures each time. But before I had the luxury of people requesting me to take photos for them, when my first tour came around it opened up a whole new world of photography! The one thing war and conflict has is alot of stuff to take photos of! Journalists are always trying to get out in amongst the action get imbeded with our troops on the ground, that’s where the best oportunitys to take photos are, the pictures that get remembered and make the headlines. They are photos of history as it happens.
My first deployment was to Iraq. I took with me a Fuji z3 compact camera and a Fuji s6500. I carried the Z3 with me all the time as its pocket size and the s6500 lived in my daysack (small rucksack) itself not a big camera and could wihtstand a good battering but it had great optics a built in 10x zoom. Both cameras provided great quality photos and video. At this time i’d considered getting an SLR but didn’t know enough about them and couldn’t afford one either!

This first image was achieved using my Fuji Z3 compact camera. As it was night time and I was stood under a spot light I realised the light was casting some great shadows. I had no tripod so put my camera on a wall and moved it round until it framed the shot. I set the timer, put the camera on night shot with the flash turned off, set it to Black and White. I pushed the shutter release button and as it counted down moved back into position and held the pose. After a few tries i ended up with this shot.

I took this photo with my Fuji s6500, being a half slr you have control over the apature or shutter but not both at the same time. I used shutter priority in this instance with no flash. Again i had no tripod so i put the camera on the bonnet of a landrover, you can use any vehicle it doesn’t have to be a land rover, set the shutter to 10 seconds and asked Warner and Fitz to stay perfectly still! I used the timer again so i didn’t cause vibration to the shot when pushing the button with my finger. Then when the shutter opened i painted Warner and Fitz with a torch for 10 Seconds. After a few trys with them moving i eventually got them to stay still!
Leading up to the end of my time in Iraq i was enjoying taking photos so much i finally bit the bullet and purchased an SLR, a Fuji S3 Pro, i stuck with Fuji as i’d grown used to them and trusted it would work for me. I still didn’t know alot about them but new i’d learn.
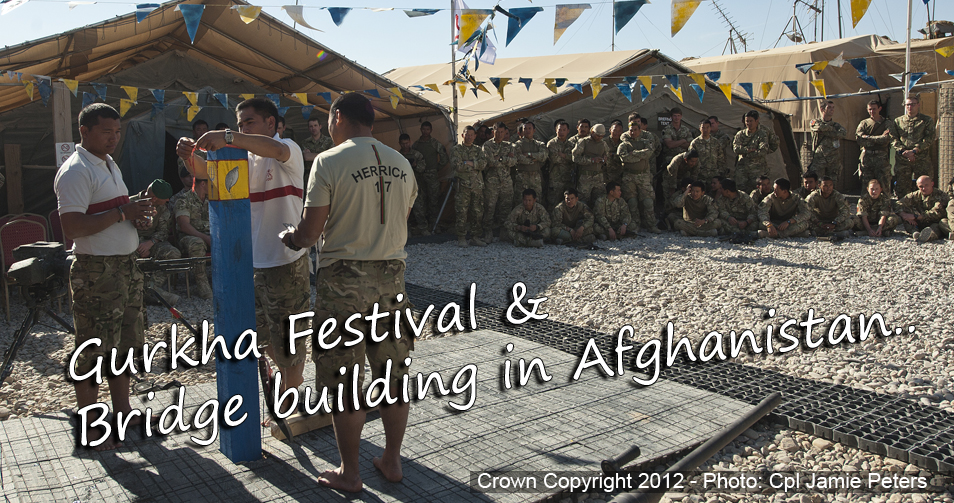
The years went by and as I explained earlier I grew in my photography and was learning all the time, then came Afghanistan, I was mobilised in Jan 2009 for a summer tour of Afghanistan, again the tours explained earlier in this blog. At this point I’d had my Fuji SLR for just over 3 years and had been toying with the idea of getting a new camera but due to the expense I kept putting it of. I realised this tour would be a great opportunity to capture some amazing images so I decided to take my camera even thought I new with the sand and conditions we’d be operating in it probably wouldn’t survive I didn’t care. I just wanted to get some great photos if it meant destroying a grands worth of camera then so be it! And that’s exactly what happened, i got some amazing photos, my camera made it through the whole tour and just when we got back to the UK the company commander asked me to take a company photo and my camera packed in the very day but at least it did the whole tour!
That’s a selection from 100’s of photos I took over the 6 months we were away, it really gave me chance to experiment and learn as I said before I find it hard to practice photography unless I’ve got some thing really interesting to take a photo of and every minute of every day I was surrounded by the surreal, the beautiful and demanding. There are so many images but the 3 bellow I feel show the key skills I developed whilst there. Also these 3 images are 3 of 6 images that won me the title of British Army Amateur photographer 2009.

Manual focus, up till my time in Afghanistan I’d always relied heavily on auto focus but with time on my hands to experiment and developing images in my head of what I want to achieve from a shot I realised that auto focus didn’t achieve that for me. This image of the little girl, I was using my 18 – 200mm Nikon VR lens zoomed into about 100mm on the lowest aperture I could have on aperture priority. By lowering the aperture as low as I could this will give me the shallowest depth of field possible. Putting anything behind or in front of the focus line out of focus. The smaller the aperture f number the thinner the focus line, in this case it was f6.2 not extremely small but as the background was far off it was small enough to put it out of focus. By manually tweaking the focus I could get the girl perfectly focused into the shot, allot easier then with auto focus as it may get the girl in focus but not how I want it. With manual focus you control the image outcome yourself. It’s allot more satisfying outcome.

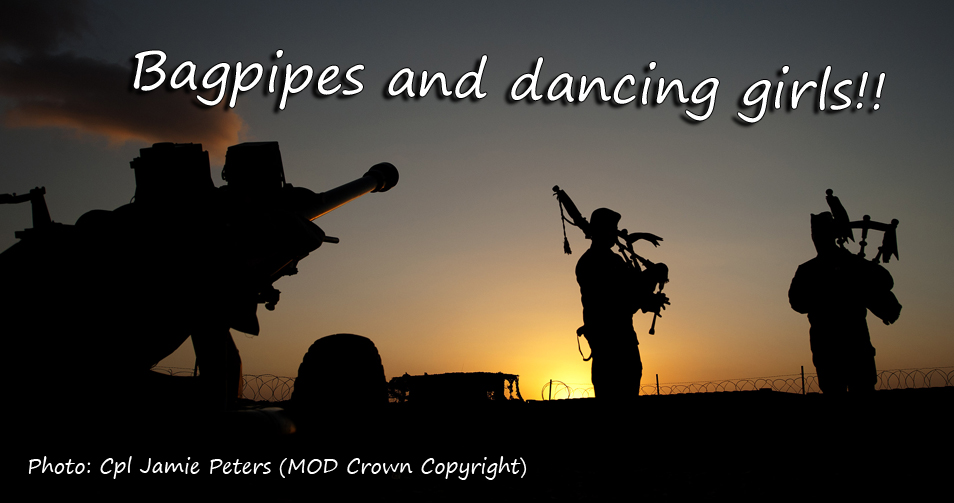
This shot was making use of all the practice I’ve had taking photos of flashing lights and torches in the dark as I talked about earlier. To achieve this photo there were allot of factors that made it hard. Firstly it was pitch black and I had to set the camera up with minimal light, not a problem to set up but when it came to focusing, the auto focus wouldn’t work as it’s to dark. So I had to estimate the distance from the camera to the mortar and put my trust in the distance on the lens focus ring. If you look on your lens the distance between you and the subject is marked on the ring so in this situation it’s your only guide as you can’t see anything through the view finder to see if it’s in focus. The next problem is knowing they may only be firing a couple of rounds so getting the ISO, Aperture and Shutter settings right were an estimated guess. The shutter wasn’t a problem as I was using a remote shutter release on a tripod. I had the camera in blub mode, if you turn you shutter all the way to the end eventually you’ll get to bulb mode and that holds the shutter open for the duration you hold the shutter button down. I new that before they fired the guy firing would shout “Firing!” then push the trigger, so I just waited with my finger poised on the remote release as soon as he shouted “firing” I opened the shutter and kept it open for about 5 seconds. After 4 attempts this one came out and this one was actually the first one.